How to Run GSD PI With a Local LLM
It is already two months since I covered GSD and Superpowers that give a more structured development approach to Claude Code. In the meantime, GSD released a fully autonomous application called GSD2 that works outside of Claude Code but still uses their infrastructure. With the new pricing model this kind of application is not covered by the monthly subscription and requires API pricing.
Let us see if we can run GSD2, or better GSD PI as it is now called, with our local LLMs.
Installation
GSD2 moved to a new location and is now developed at open-gsd/gsd-pi. We can install it with this NPM command:
To check if you have the newest version, you can run this command:
I used version 1.2 for my tests. If you want to upgrade, you can use this command or deinstall and reinstall the package:
Prepare LM Studio
We must make sure that we load the models with a high enough context size and increase the parallel processing to offer enough resources. We can do this with one of these commands on a GB10:
lms load openai/gpt-oss-120b -c 134144 --parallel 16
lms load qwen/qwen3-coder-next -c 262144 --parallel 16
Configure the local models for GSD PI
We can set our own models for GSD PI in a file named models.json that goes into your C:\Users\USERNAME\.gsd\agent\ folder and needs a model definition like this one:
Save this file and then open the gsd application. As soon as it started, we can use /model to go to the model selection and pick one of our models.
Challenge: Image Locator
I need something larger to test a system like GSD PI and came up with this little clone of Pic2Map where we can upload an image and it shows the location based on the GPS data in the EXIF metadata. The requirements for my test case are in the file image_locator_requirements.md:
To kick off the development, I use this prompt:
Baseline
As a baseline I did run GSD2 against the Claude models a few weeks back, that gave me a working application after about 1 hour. I only needed to make one round of fixes because the map tile was too large and I could not scroll down to the images.
Mixed results
All Tests run against models on GB10, the same machine I used for the Claude Code with local LLM tests, because for this kind of tests the context size matters most.
OpenAI GPT OSS 120B
OpenAI GPT OSS 120B started strong: it made a plan, started to build the Flask application and right in the middle of the tasks it started with tool call failures created by not enough context size. No matter what I tried, the errors reappeared and I had to end the test before I got a usable application.
Qwen3 Coder 30B
Qwen3 Coder 30B allowed me to use twice the context size of GPT OSS. After 40 minutes and 6 million tokens the work was done. Unfortunately, the GPS data was not recognised and all points ended up in the golf von Guinea (at 0/0). I tried to fix that problem in multiple rounds, but 30 minutes and 7 million tokens later I was at the same point. A second attempt ended up with similar disappointing results.
Qwen3 Coder Next
Qwen3 Coder Next was quick in coming up with a solution. After 25 minutes and 10 million tokens GSD PI declared the end of the work, and I got an application where the upload functionality did not work. I could not get GSD PI to fix that basic problem, and it kept digging deeper in its hole of non-working software.
I had to abandon this attempt and start from scratch. This time it listened to the requirements and wrote end to end tests with Playwright. That allowed GSD PI to figure out on itself that another, older, process may still be up and serve an outdated application. The price for this problem solving was time and tokens. And token it used as if there is no tomorrow. Especially the bugs inside GSD PI who blocked the verification of a slice and repeated this check over and over, cost an hour of the total time of 2 hours and 20 minutes. At the end it took about 45 million tokens to present me with this solution:
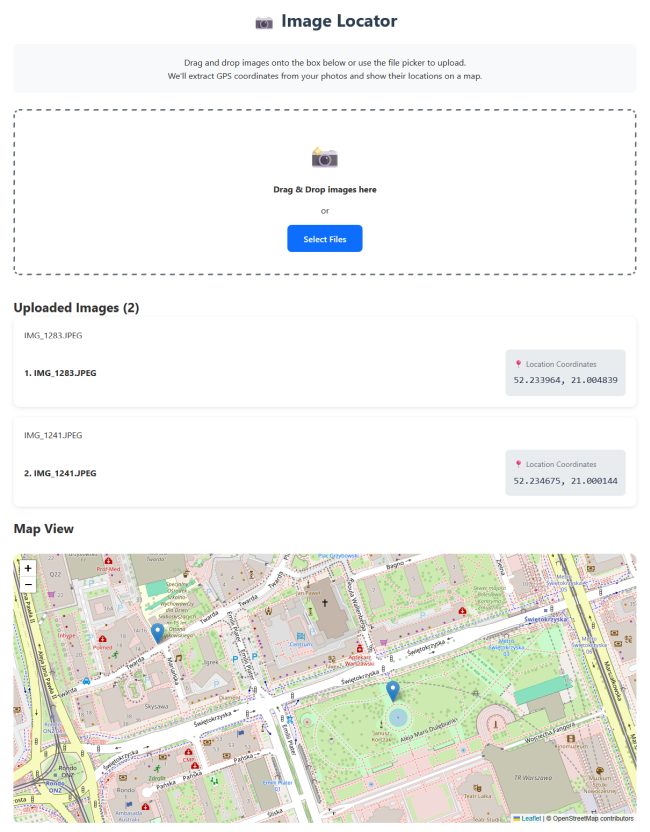
As we can see at the first glance, there are a few features missing, like the numbers for the images and the thumbnails. I had something, but it was not worth the extra time and the massive number of tokens it wasted.
Qwen 3.6 35B
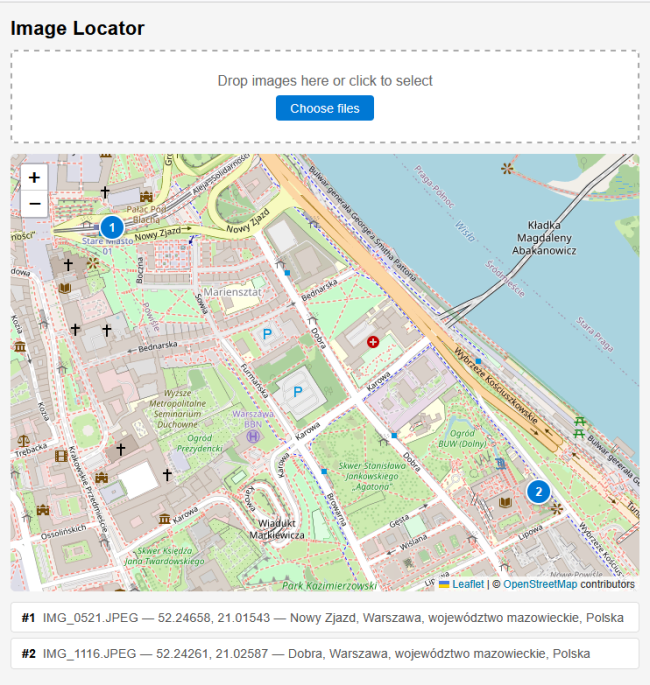
Qwen 3.6 35B with a context size of 262144 tokens finally did the work. It took about 15 minutes of planning and then run for an hour to implement the application. After spending 4.7 million tokens, I ended up with a tool that does what I need, and it even included nice to have features like showing the address of a location:
It would have been faster if GSD PI did not mess up the Git worktree. But thanks to Gemini, I could fix that problem in less than 10 minutes.
Even with this Git hiccup, the Qwen 3.6 35B model is the one I would use with GSD PI in the future. It is fast enough to make progress and produces code that solves the problem in a useful way.
Conclusion
Combining GSD PI with Qwen 3.6 35B on a GB10 gives us enough speed to do some serious work. With 75 minutes it is a little bit slower that the 60 minutes it took Claude Sonnet to build the same application. But that 75 minutes are with fixing a Git problem that Sonnet did not produce.
While it is a little bit slower, it has one big plus to run GSD PI with local LLMs: the price. Developing this little application could cost between 30$ and 250$ in API calls for the Claude models, while the local model runs for free after we paid the hardware.
When it comes to GSD PI itself, I am disappointed. The many bugs I run into on top of an unclear user interface left mixed impressions. On one hand it looks like magic when the coding agent turns your requirements into executable code, runs browsers to check if all works and spots problems that it then fixes. On the other hand, we get such an enormous black box of technical solutions that it is nearly impossible to fix problems outside of such an agent. And the agent itself has its own problems that waste time and needs constant attention to stay on track.
As much as I liked GSD 1, GSD PI is a completely different creature. In its current form it is too unpredictable for me. I had so vastly different interactions in my few tests that I have no clue what the “normal” would be for GSD PI. Without that knowledge there is no way to notice if something is off that needs our attention. We are left with going along and at the end see if those millions of tokens were used for something useful. That is not how I want to work.
Next
A fully autonomous coding agent like GSD PI can run with local models. That is good news for the ever-increasing API pricing of hosted models. Not so impressive where the bugs of GSD PI that would cost me hundreds of dollars if I had run them against hosted models. If you know what I did wrong, let me know - I like to improve.
Next week we see how we can work with LM Studio through the command line tool lms.